How to update your website with WebDAV
In order to access your web space on our servers, you can use the WebDAV protocol (“Web Distributed Authoring and Versioning” – an extension of the HTTP protocol). Until recently, the access was based on the FTP protocol, which then proved not to ensure at best our users’ anonymity and privacy.
The only information you need in order to connect to our website through WebDAV is the server name (https://www.autistici.org/dav/
the same name for all users), your user name, which you can find in the ‘Websites’ section of your User Panel, and the
password we sent you when your website was activated. It is important that you always use www.autistici.org as the server name, or
some clients might get confused and fail.
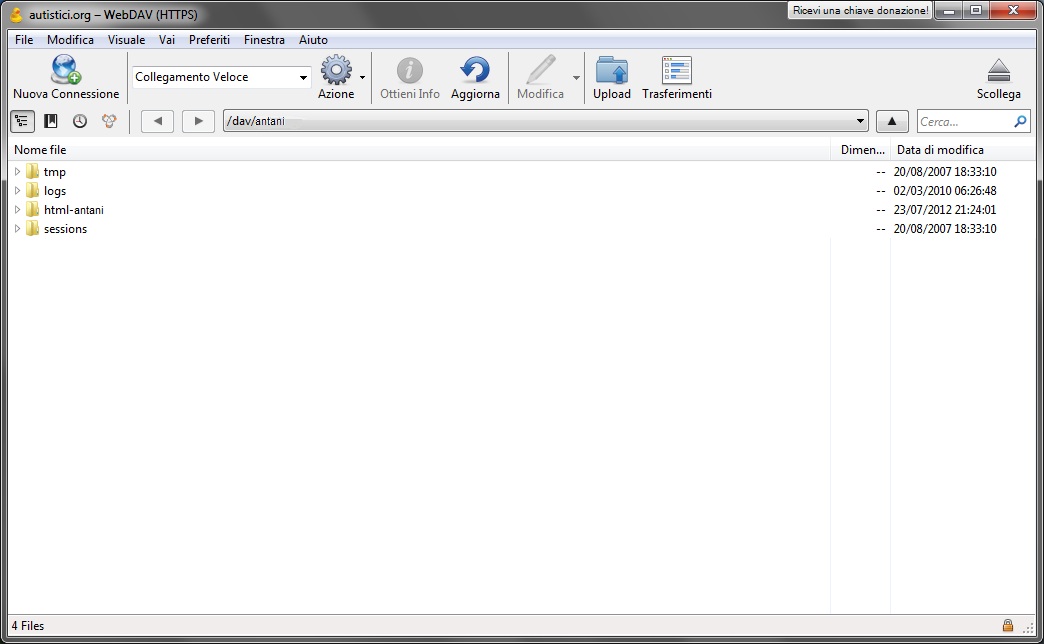
The directory containing your website is called html-sitename, and it’s the one you’ll find as soon as you connect to our server via WebDAV.
If you want to change you WebDAV password, you can do it directly in your User Panel: log in with your mail user and password, click to enter the Websites section and look for the ‘Change password’ link.
In order to connect to a website through the WebDAV protocol, you need a client program, which will vary according to the operating system you use.
Linux - Nautilus (graphical interface)
On Linux, you can use your file browser Nautilus (the one you use when you explore your directories in your pc).
Open any directory in your pc.
After moving your mouse to the top left File menu, select Connect to Server. A box will appear: here you can enter the data to connect to the remote server.
![]()
In the drop-down menu, select “Secure WebDAV (HTTPS)” and fill in the following fields with the required data (your user name and password):
- Server: www.autistici.org
- Port: 443
- Folder: /dav/username
- User Name: username
- Password: password
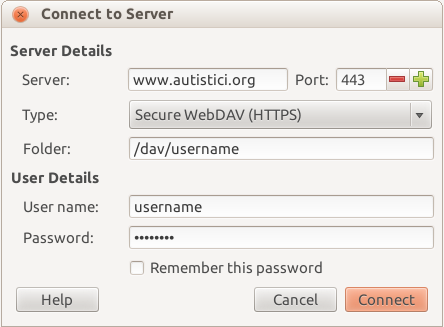
Click “Connect “.
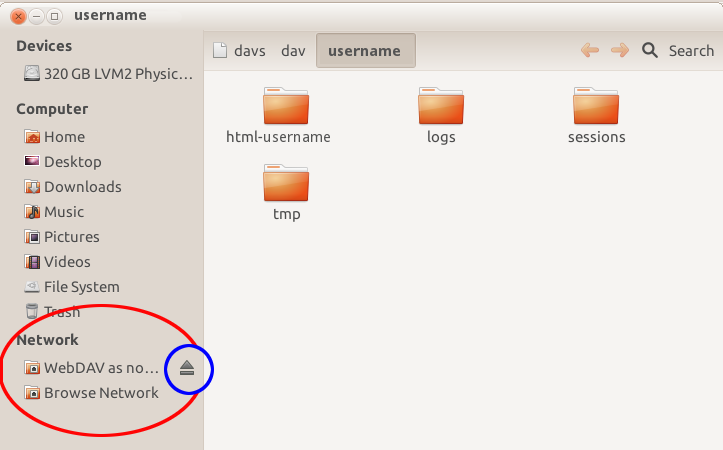
In your file browser, you’ll see the content of your folder on the server. Upload your website to the directory “html-sitename”, and it will become visible online.
In the bottom left corner, you will notice a “Network” section, where you can find a link to your remote directory until you disconnect from the server.
To disconnect from the server, click on the small triangle highlighted by the blue circle in the picture. Enjoy!
Linux - Cadaver (command line interface)
Another alternative for Linux systems is the command-line program cadaver.
After having installed it (for example with apt-get install cadaver on a Debian system), use the following command:
$ cadaver https://www.autistici.org/dav/youraccount
Replacing youraccount with your WebDAV username.
Note: if you are using Tails, you might need to use torsocks e.g.:
$ torsocks cadaver https://www.autistici.org/dav/youraccount
Accept the certificate and enter your user name and password for the web access (you’ll find these data in your user panel).
With cadaver, your interface is from command line. The commands that you will most likely need are the following:
- cd: to move to a particular directory in the server
- lcd: to move to a particular directory in your pc
- ls: to visualize the content of a directory in the server
- lls: to visualize the content of a directory in your pc
- put: to upload a file from your pc to the server
- mput: to upload more than one file or directory (add -r) from your pc to the server
- get: to download a file from the server to your pc
- mget: to download more than one file or directory (add -r) from the server to your pc
davfs2
Linux users can also use davfs2 to mount the site in a directory.
First, install it, on Debian:
# apt-get install davfs2
Add your user to the group ‘davfs2’:
# gpasswd -a youruser davfs2
Create the directory where you want to mount the site:
# mkdir /media/username
give the permission to your user:
# chown username /media/username
# chmod 0700 -R /media/username
Modify fstab to allow mounting/unmounting the directory:
# nano /etc/fstab

### add this line at the bottom of the file fstab:
https://www.autistici.org/dav/username /media/username davfs noauto,users,rw,uid=youruser 0 0
If you want to mount using your user, give the setuid permission to the executable,
# chmod u+s /sbin/mount.davfs
or, better for security, mount as root or using sudo.
Try if it works:
$ mount /media/username
If you get error “/sbin/mount.davfs2 file /home/youruser/.davfs2/secrets has wrong permissions” be sure that the file ~/.davfs2/secrets has permission 0600:
$ chmod 0600 ~/.davfs2/secrets
If you want to avoid entering the username every time (and also password, not recommended unless you have an encrypted partition) you can modify the file secrets in this way:
$ nano ~/.davfs2/secrets

/mount/username username password #password is not mandatory, if you want to insert it every time.
To umount: $ umount /media/username You can also set automount at the boot, changing the parameter in fstab from ’noauto’ to ‘auto’, and specifying the password in the file secrets
MAC OSX
In the Finder menu, select ‘Go/Connect to server’ and you will see a window, where you should enter these data:
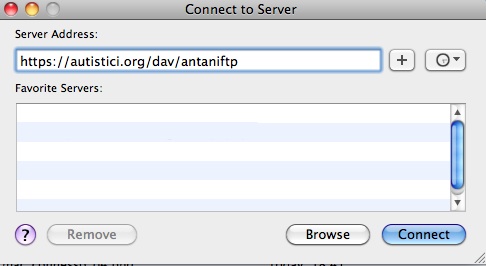
The Server address should be https://www.autistici.org/dav/DAVUSERNAME (replace ‘DAVUSERNAME’ with your user name).
Now click on the + sign so as to add this address to your favourites, then click ‘Connect’.
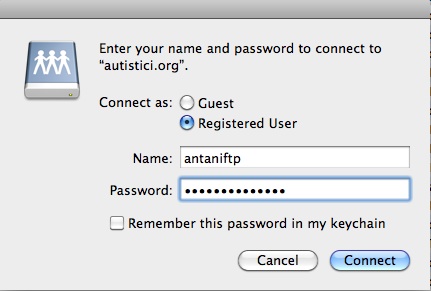
Enter your user name and password (see above), and you will access a sort of disk where you can upload and download files. When you wish to disconnect from your space, do as you would do with any hard disk or USB pen: for instance, click the triangle-shaped icon beside the server name.
Windows / Mac
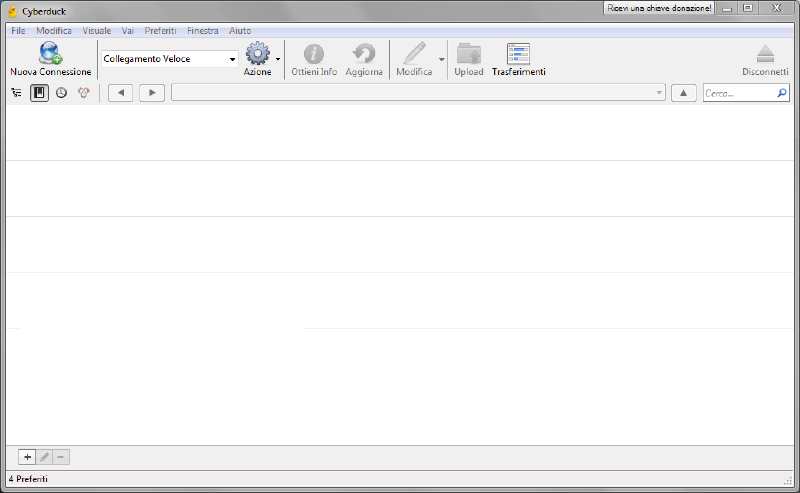
Besides using the dreadful Internet Explorer, you can download a specific WebDAV client such as CyberDuck.
Once you have installed the software, launch the program.
-
Click on ‘New Connection’
-
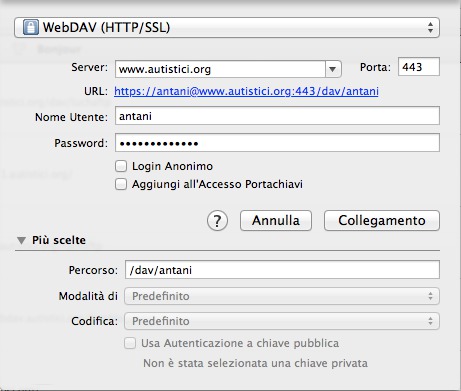
Enter your data:
- Server: www.autistici.org
- Port: 443
- User Name: your WebDAV user name
- Password: your WebDAV password
- More Options - Path: /dav/DAVUSERNAME
-
Click on ‘Connection’
-
Enter your user name and password
Now you should see a window with the directories of your web space.
iPAD
You can connect with the ‘WebDAV Nav’ App (free or pro version), which you will find in the App Store.
- Launch the App.
- Click the + sign
- Enter the connection data:
- Name: whatever you like – its only use is to remember what it’s all about.
- ServerURL: https://www.autistici.org/dav/DAVUSERNAME (replace DAVUSERNAME with your user name, which you’ll find in the user panel.
- User Name: the name you found in your User Panel (yes, the same as before).
- Password: enter your DAV access password.
- Click “Save”.
- Now you can see a window with the name you’ve chosen: click on it, and if you visualize a window with light-blue folders, it means you are connected.
Gitlab CI
If you’re using a Gitlab instance to manage the sources of your static website, you might find it convenient to automatically upload new versions of the site on every change. You can use the rclone tool to upload your website through Gitlab’s continuous integration.
Here is an example of a .gitlab-ci.yml CI configuration file to
build a static website and upload it to our servers:
stages:
  - build
  - push

variables:
  WEBDAV_URL: https://www.autistici.org/dav/myuser/
  WEBDAV_REMOTE_PATH: html-mysite.org/
  WEBDAV_USERNAME: myuser

build:
  stage: build
  image: registry.gitlab.com/pages/hugo:latest
  script:
    - hugo
  artifacts:
    paths:
      - public/

push:
  stage: push
  image:
    name: rclone/rclone:latest
    entrypoint: [""]
  dependencies:
    - build
  script:
    - "rclone sync --webdav-url ${WEBDAV_URL} --webdav-user ${WEBDAV_USERNAME} --webdav-pass $(echo -n \"${WEBDAV_PASSWORD}\" | rclone obscure -) ./public/ :webdav:${WEBDAV_REMOTE_PATH}/"
The build stage in the above script is just a hypothetical example, which builds a static site with Hugo, a common site builder tool. The tool writes its output into the “public” directory.
The push stage will need you to set appropriate values for the WEBDAV_URL, WEBDAV_REMOTE_PATH and WEBDAV_USERNAME variables (as well as WEBDAV_PASSWORD which should be set via the environment, and not saved in the CI configuration).
JavaScript license information